
How to Install a NATO Receptacle
In most cases, M-series vehicles are outfitted with a 2-pin style slave cable receptacle. However, should you find the need to install one yourself, our team can show you how! But what is a NATO receptacle? A NATO receptacle is part of a NATO field plug that plays a critical role in charging external electronics, and allowing for a jump-start in the field. Installing a NATO slave receptacle creates a port where electricity can flow to and from M-series vehicles. Discover the tools you will need and how to install a NATO receptacle below!
What Will I Need to Install a NATO?
The first step in installing a NATO receptacle is to choose the appropriate position and gather your tools. Once you have identified the proper placement on your M-series vehicle, the following tools will help you tackle the job:
- Pistol drill
- Hole saw
- Drill bits
- Welding cable
- Compression tool and compression lugs
- 8-inch Panduit heat shrink (stock number HSTT75-48-5C)
- Round head machine screws
- Tywrap cable ties
Steps to Install a NATO Receptacle
Step 1:
Start by creating the hole for the body of the receptacle using the bone saw and pistol drill. Set the receptacle in place and mark the locations for the four mounting holes. Drill out the four mounting holes.
Step 2:
Attach a lug to the end of the welding cable and compress it to the wire. Cover the insulation wire with a short sleeve of heat shrink tubing. Carefully and evenly shrink the tubing around the cable. Repeat this process three more times.
Step 3:
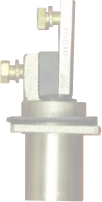
On your NATO receptacle, locate the two 3/8 inch bolts. With a continuity meter, determine which bold will be used for grounding, and which will be used to connect to the battery. Be sure to measure enough wiring to enable the battery tray to slide out with some slack. Connect both cables to the receptacle and mount it in place with your round head machine screws.
Step 4:
Fix the ground lug to the frame or another substantial metal area. Connect the hot wire to the battery department and be sure to install a rubber bushing to protect the wire. Connect the wire to the appropriate terminal and test for 24-volts at the receptacle. Secure the cables in place using the wire ties.
Use extreme caution when working around batteries. Connections between positive terminals and the ground can become a safety hazard and a health risk.
Team Up With Gateway Cable Company
When you need a reliable partner for your military-grade electrical needs, turn to Gateway Cable Company. Since 1979, we have specialized in electrical connectors and cable assemblies for the military. As an ISO 9001-certified company, you can rely on our work. All of our products are traceable to US origins and are DFAR compliant. To learn more about NATO receptacles contact us or request a quote for your job online.